|
|
|
|
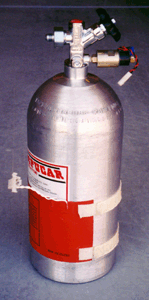
Here's my bottle with the NX bottle heater, NX transducer and the NOS Super Hi-Flow valve. You can see the size of the NX heater...much larger than the others out there. This thing draws up to 20 amps! |
At this point, I have also added the NOS nitrous pressure gauge. By utilizing the other before-the-valve port on the NOS Super Hi-Flow valve, I can get a pressure reading without the bottle valve even having to be on. The same goes for the NX heater...the valve doesn't have to be open for it to accurately monitor nitrous pressure. |
|
|
|
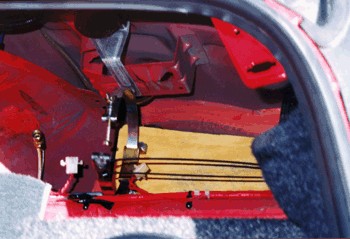
Here I built a false floor for the bottle mounts. I used a piece of 1/2" plywood to create a fairly level surface, so that the bottle would sit at the correct angle. The bottom of the well is deeper at the front, for the spare, so I brought it up by adding a piece of 4x4" below the plywood. The nitrous line is run from the bottle, down to the remote bottle valve, then down and out the bottom drain hole. I simply poked a hole in the existing rubber grommet and fed the line through. |
|
|
|
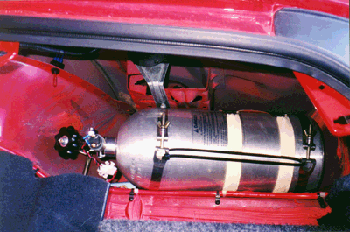
Here's the bottle mounted in it's spot where the spare tire and jack used to reside. As you can see, it's a nice fit. |
|
|
|
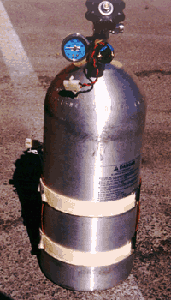
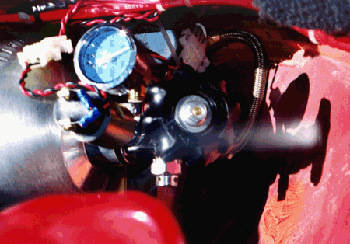
Here's another angle of the bottle in it's place. You can just see the blue NOS remote bottle valve below the pressure gauge. I hard mounted the remote bottle valve so that it did not have to be disconnected when removing the bottle for filling. As you can see, my NX bottle heater pressure transducer is also plug wired, as is the heater itself, to facilitate quick bottle removal and installation. |
|
|
|
|
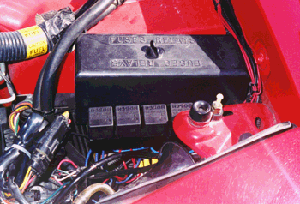
Here's all the nitrous wiring under the hood. I went to a company called Waytek and picked up the Bosch relays and their corresponding relay sockets for the wiring. It's much cleaner than just having spade clips go to all the relays. There are five relays total: Master Arm, Purge, Safety, Nitrous Solenoid and Fuel Solenoid. You can also just see the Accel 300+ box just below and to the left of the stock fuse block. |
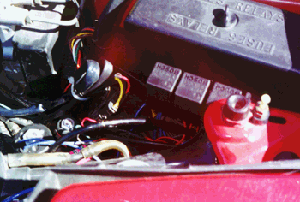
Here's another view of the wiring. You can also see the tops of the solenoids to the left of the picture. The larger one is the Nitrous Express .125" orifice nitrous solenoid. There is a "T" on the inlet side of that where one of my original Compucar nitrous solenoids is used as a purge for the system. You can also see the smaller Compucar fuel solenoid just to the right of the nitrous solenoid. Easy placement put it just infront of the ABS module on a piece of 1"x1/8" steel strap. |
|
|
|
|
Here's a picture of the plate mounted just behind the stock throttle body. As you can see, I have added a 90 degree -3AN elbow to each of the jets for clearance. I then also covered the braided lines in a 5/8" fuel hose to conceal the bright stainless, and to keep rub problems down. |
|
|
|
Here's my converted ashtray. You can clearly see my two stereo related knobs - one for the ESP-2 spatial expander, and one for the Epicenter Bass Restoration. Just forward of the left knob, you can just see my nitrous master arming switch. Without this armed, the system will not fire and the bottle valve is in the OFF position. When turned on, the bottle valve opens and a red LED on the A-pillar illuminates to notify me of a ready status. |
UPDATE 12/26/2000
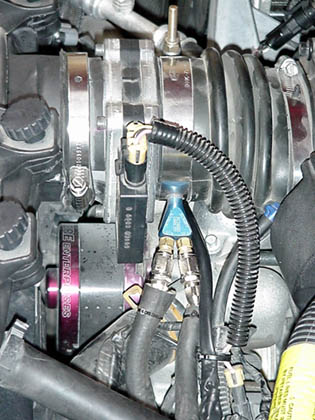
I have recently forgone the CompuCar plate in favor of a single Nitrous Express (NX) Shark fogger. I removed the plate from behind the throttle body, then drilled and tapped the rear of the aluminum MAF sensor housing for the fogger. This was accomplished by purchasing a 3/4" wide clamp, drilling through the clamp, through the rubber hose and into the MAF end itself. I then tapped the MAF end and threaded the fogger into it. Here's what it looks like installed:
|
|
|
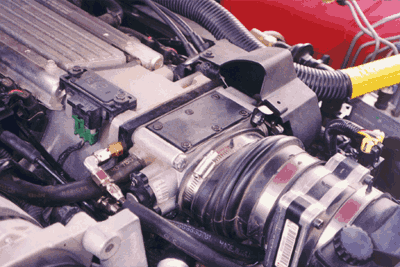
As you can see, it gets lost in all the underhood hoses, and is probably less noticeable than the plate was. The fogger sits in the 4 o'clock position (as viewed from the front), which puts it right in the center of the drivers' side throttle body opening. It hits HARD too. |
|
|
|
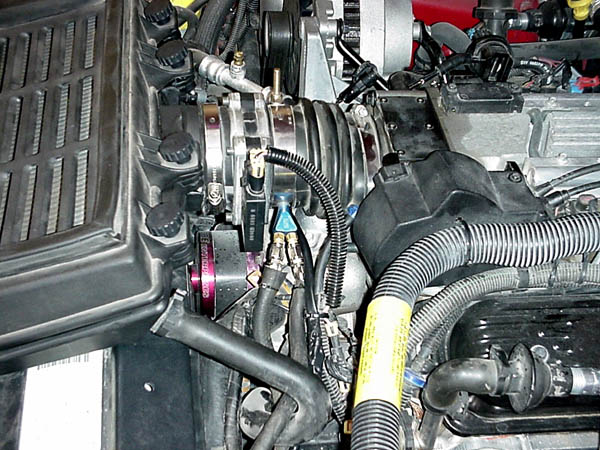
Here's a more generalized picture of its placement. |
I've also recently installed Matt Paul's ATPSS (Adjustable TPS Switch) to trigger the safety solenoid of my nitrous kit. Previously I had used a magnetic reed switch, but after two years of use, it just crumbled and the plastic housing basically fell apart. The ATPSS is a solid state, electronic switch that is adjustable for the throttle position at which you want your relay/nitrous to be activated at. For more info, check out the page on its install: ATPSS.