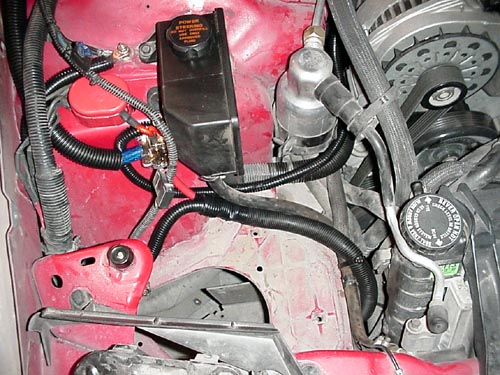
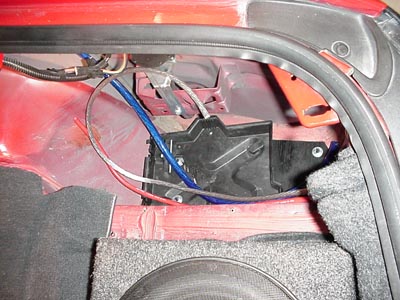
The stock battery area is quite a mess. It takes up a lot of room, puts the heavy battery right up front, and uses a battery tray that commonly breaks the front hold-down. For my upcoming twin turbo/twin intercooler application, the stock overflow bottle is also in the way, which is a part of the battery tray and hangs down through the large hole below the tray. By removing this, I have a lot more room down there for my intercooler. This picture shows the battery area with the battery and battery tray removed. I have now run a 4ga wire from the starter to the distribution block for the positive side, and a 4ga wire from the block/engine mount to the negative post as well. You can see the new wire loom in the middle of the picture which covers the two 4ga wires. I've also used a new 8ga wire (covered in loom) from the alternator to the distribution block, and a short piece of 8ga from the block to the stock power point (in the red junction box). I then used a 0ga wire from the battery up to the distribution block for a power source.

Here is a better view of the distribution block. You can see the red 4ga wire coming out the bottom going to the starter, the 0ga coming in the left side from the battery, and the two 8ga wires (one for the alternator and one for the power junction box) coming out the top. I used a Stinger SDB01448L distribution block for this task.
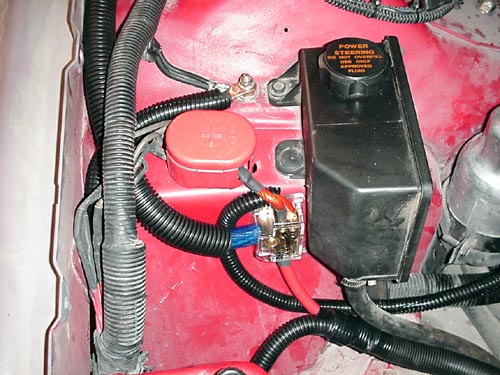
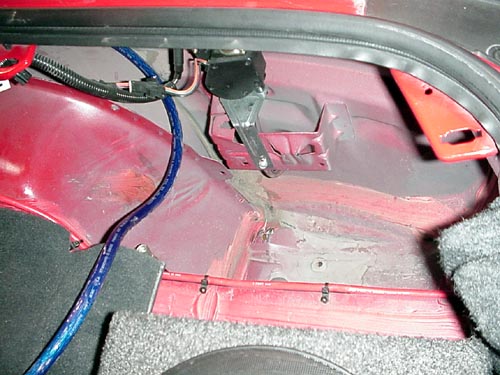
Here is a better overall picture of the installation. In this picture, you can also see where the 4ga ground wire connects to the stock ground post, just above the red junction box.
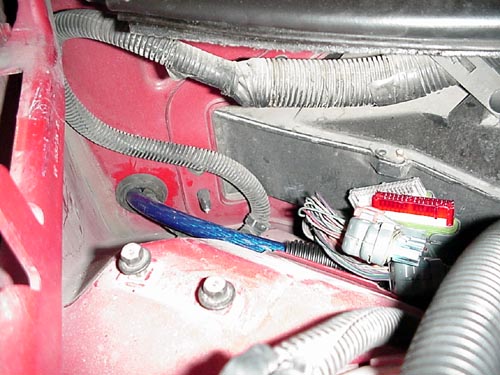
Just below the ECM, there is a gromet in the firewall which I used to pass the 0ga wire. My original stereo 4ga came through here, so I decided to use it for the 0ga as well. When you shove it through, it comes out in the passenger footwell area.
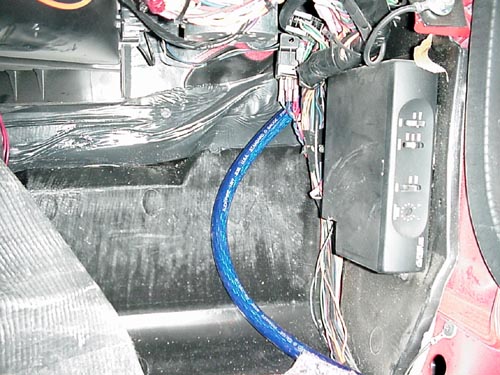
Here is the passenger footwell area where the cable comes out. As you can see, my car already has some stuff there, but it's not too tight. When the carpet lays down, you can't even tell the cable is under there.
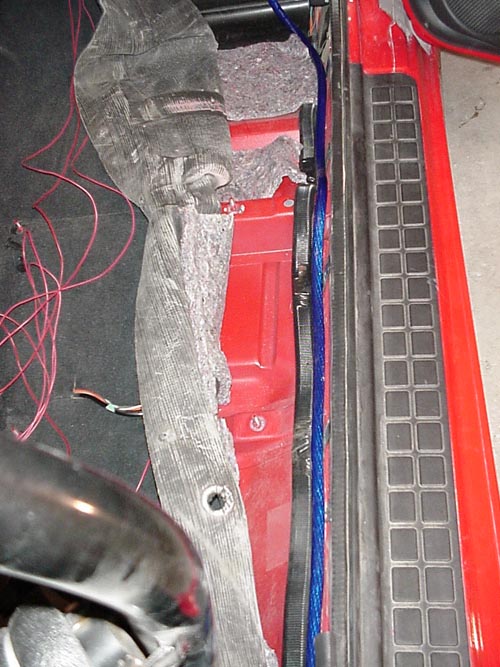
I ran the 0ga wire right next to the stock wiring harness down the passenger side doorsill. It lays nicely in place.
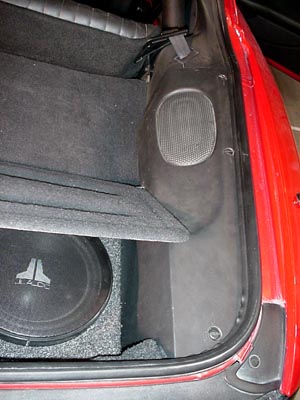
This will be the final resting place for the battery. I ran the wire over the rear inner fender and out into this area. The spare tire has been gone for a while, and the nitrous bottle sat here, but that too is gone. The battery will fit nicely in this area.
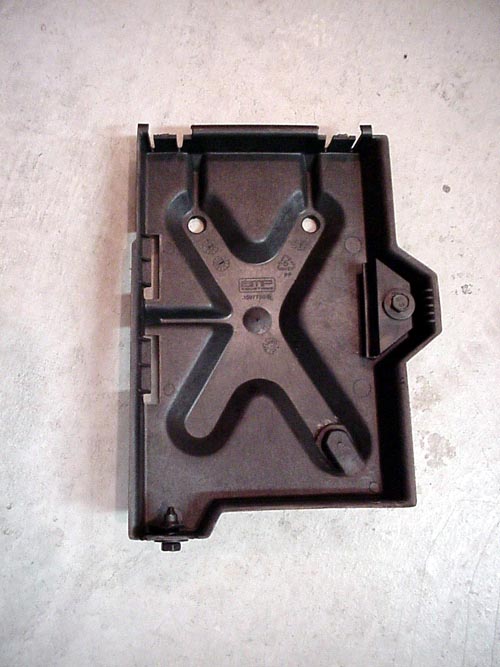
The biggest constraint in the spare tire will is side-to-side clearance. There is just about 7 inches between the left side of the spare well and the power antenna bracket. Our Group 34 batteries (being 6-7/8" wide) JUST fits. The big thing here was to use a battery tray the located the batter all the way to the left edge of the area. Most of the aftermarket trays use a hold down bracket that comes across the top of the battery, then two "J" hooks which secure it to the tray mounted in the bottom. Since we don't have any side-to-side room here, I searched and searched for a stock style battery tray with the hold down at the bottom. My quest was finally over when I found Wrangler North West Power Products in Portland Oregon. Stan at Wrangler NW listened to my ideas, and within a day came up with the 34-959-3 battery tray. At $42, it was EXACTLY what I wanted. I guess it comes from a Chevy pickup, but that's besides the point. It had the footmount hold down that I wanted.
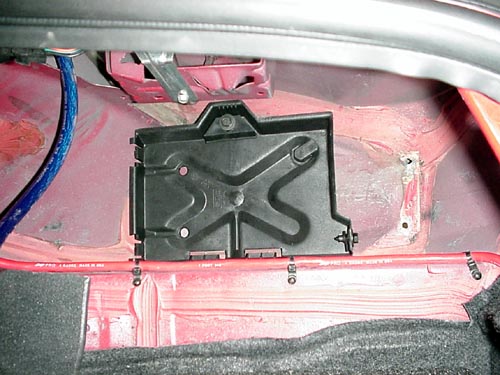
Here is a picture of the tray in the well. It's a perfect fit.
Here's the tray mounted, with the cables coming toward it.
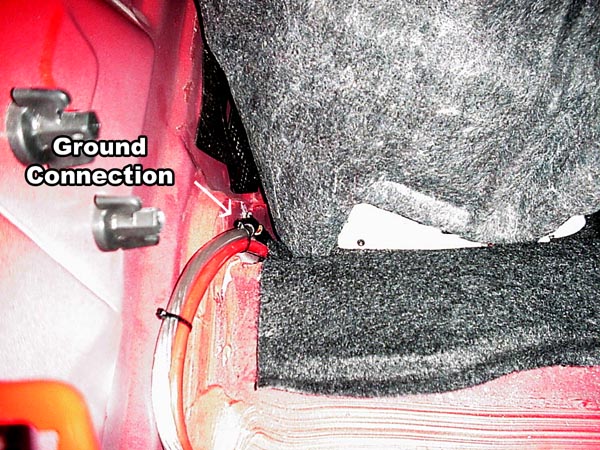
This is where I picked for my ground connection. My stereo installer had scraped away the paint and threaded a
self-tapping screw in here. I just used the same connection and added my 4ga ground wire.
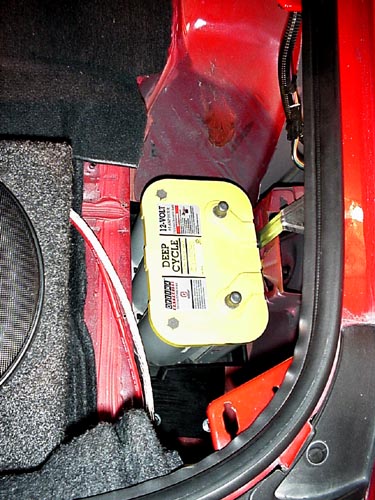
Here's the battery in the tray and secured down. It fits nice and snug. Since this battery also has side posts,
I RTV'd the plastic protective covers in place. They are right up agains the power antenna bracket, which actually
adds some stability.
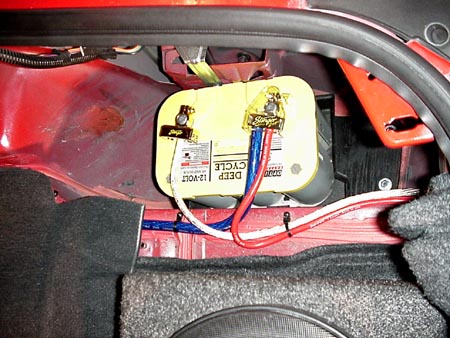
Here the is the finished product. I've run all the cables. I again used Stinger Electronics products. I used
their SBTMOP (positive) and SBTMON (negative) gold terminals that offer a single 0ga, single 4ga and two 8ga connections.
I also used their SBTCOV cover to protect the positive side. Eventually when I put in the dual fuel pumps, I'll
use the 8ga positive connections to run wire right from the battery to the pumps.
When all buttoned up, you'd never know it was back there.